Skip to content
GuidesJuly 19, 2026

How to Set Up Your First Guitar Pedalboard

Setting up your first guitar pedalboard can feel overwhelming. Between choosing the right pedals, understanding signal chain order, and dealing with cables and power supplies, there is a lot to learn. This beginner pedalboard guide will walk you through everything you need to know to build a reliable, great-sounding pedalboard that will serve you for years to come.

Why Use a Pedalboard?

Before diving into the specifics of how to set up guitar pedalboard systems, it is worth understanding why guitarists use pedalboards in the first place.

A pedalboard is more than just a convenient way to organize your effects pedals. It is a complete system that keeps your pedals secure, organized, and ready to use. Without a pedalboard, you will find yourself constantly bending down to adjust settings, dealing with tangled cables, and risking damage to your pedals during transport.

Pedalboards offer several key advantages. First, they protect your investment. Quality effects pedals are not cheap, and a good pedalboard keeps them safe from being kicked, stepped on, or knocked over during performances or rehearsals. Second, they improve your workflow. When your pedals are mounted and organized logically, you can make adjustments quickly without disrupting your playing. Third, they make transportation easier. A properly set up pedalboard with everything mounted and connected means you can grab it, head to a gig, and be ready to play in minutes.

For beginners, starting with a pedalboard from the beginning establishes good habits. You will learn proper signal chain order, understand power requirements, and develop an organized approach to building your sound.

Choosing Your First Pedalboard

The first step in your first pedalboard setup is selecting the board itself. Pedalboards come in various sizes, materials, and price points.

Start by considering how many pedals you currently own and how many you plan to add in the near future. A common mistake beginners make is buying a board that is too small, forcing them to upgrade within months. It is generally better to have a bit of extra space than to run out of room.

For most beginners, a medium-sized board that can accommodate 5-8 pedals is ideal. This gives you room for the essentials plus space to experiment. Common sizes include boards measuring around 20-24 inches wide and 12-14 inches deep.

Material matters too. Wooden pedalboards are sturdy and often beautiful, but they are heavier. Aluminum boards are lightweight and durable, making them excellent for gigging musicians. Some boards come with built-in power supplies, which can be convenient but also more expensive.

Popular beginner-friendly options include the Pedaltrain Classic series, which offers various sizes with a simple, reliable design, and the Donner DB-series, which provides good value for budget-conscious players. Whatever you choose, make sure it includes a quality carrying case or gig bag for protection.

Essential Pedal Types for Beginners

Understanding the basic categories of guitar effects helps you make informed decisions about which pedals to include in your setup.

Tuner Pedals: Every pedalboard should start with a tuner. A tuner pedal not only keeps your guitar in tune but often includes a mute function, allowing you to tune silently between songs. The TC Electronic PolyTune and Boss TU-3 are industry standards.

Overdrive and Distortion: These pedals shape your core tone and are essential for most styles of music. Overdrive pedals like the Ibanez Tube Screamer provide a warm, natural breakup, while distortion pedals like the Pro Co RAT deliver heavier, more aggressive tones. Most guitarists start with one overdrive pedal and build from there.

Modulation Effects: This category includes chorus, phaser, and flanger pedals. These effects add movement and texture to your sound. A simple chorus pedal like the MXR Analog Chorus or Boss CH-1 is a versatile starting point.

Delay: Delay pedals create repeating echoes of your notes, adding depth and space. They are incredibly versatile, useful for everything from subtle thickening to dramatic soundscapes. The Boss DD-series and TC Electronic Flashback are popular beginner choices.

Reverb: Reverb simulates the natural reflections of sound in different spaces. While many amps include built-in reverb, a dedicated reverb pedal gives you more control. The TC Electronic Hall of Fame and Electro-Harmonix Holy Grail are excellent options.

You do not need all of these categories immediately. Many guitarists start with just an overdrive and a delay, then add effects as their needs and budget allow.

Understanding Signal Chain Order

One of the most important aspects of learning how to set up guitar pedalboard systems is understanding signal chain order. The sequence in which you connect your pedals dramatically affects your overall sound.

While there is room for experimentation, there is a standard order that works well for most players: Guitar, Tuner, Wah/Filter, Compressor, Overdrive/Distortion, Modulation, Delay, Reverb, Amplifier.

The tuner comes first because you want to tune your pure guitar signal before it is colored by effects. Plus, if your tuner has a mute function, it can kill your entire signal chain when activated.

Wah and filter pedals work best early in the chain where they can respond to your guitar dynamic range. They are designed to interact with your guitar tone before it is processed by other effects.

Compression typically comes before gain pedals. It evens out your playing dynamics and can help overdrive and distortion pedals respond more consistently.

Overdrive and distortion pedals belong in the middle of your chain. Placing modulation effects after gain pedals prevents your distorted tone from becoming muddy or washy. If you have multiple drive pedals, experiment with the order, but generally, lighter overdrives go before heavier distortions.

Modulation effects (chorus, phaser, flanger) come after your core tone is established. This prevents your chorus from making your distortion sound unclear or your phaser from creating harsh artifacts when combined with heavy gain.

Delay and reverb pedals work best at the end of your chain. These are ambient effects that should be applied to your complete, processed tone. Putting them earlier can create strange artifacts when combined with distortion.

This standard guitar pedalboard order is not a strict rule, though. Famous guitarists have achieved unique sounds by breaking these conventions. Once you understand the basics, feel free to experiment.

Patch Cable Selection: Why Quality Matters

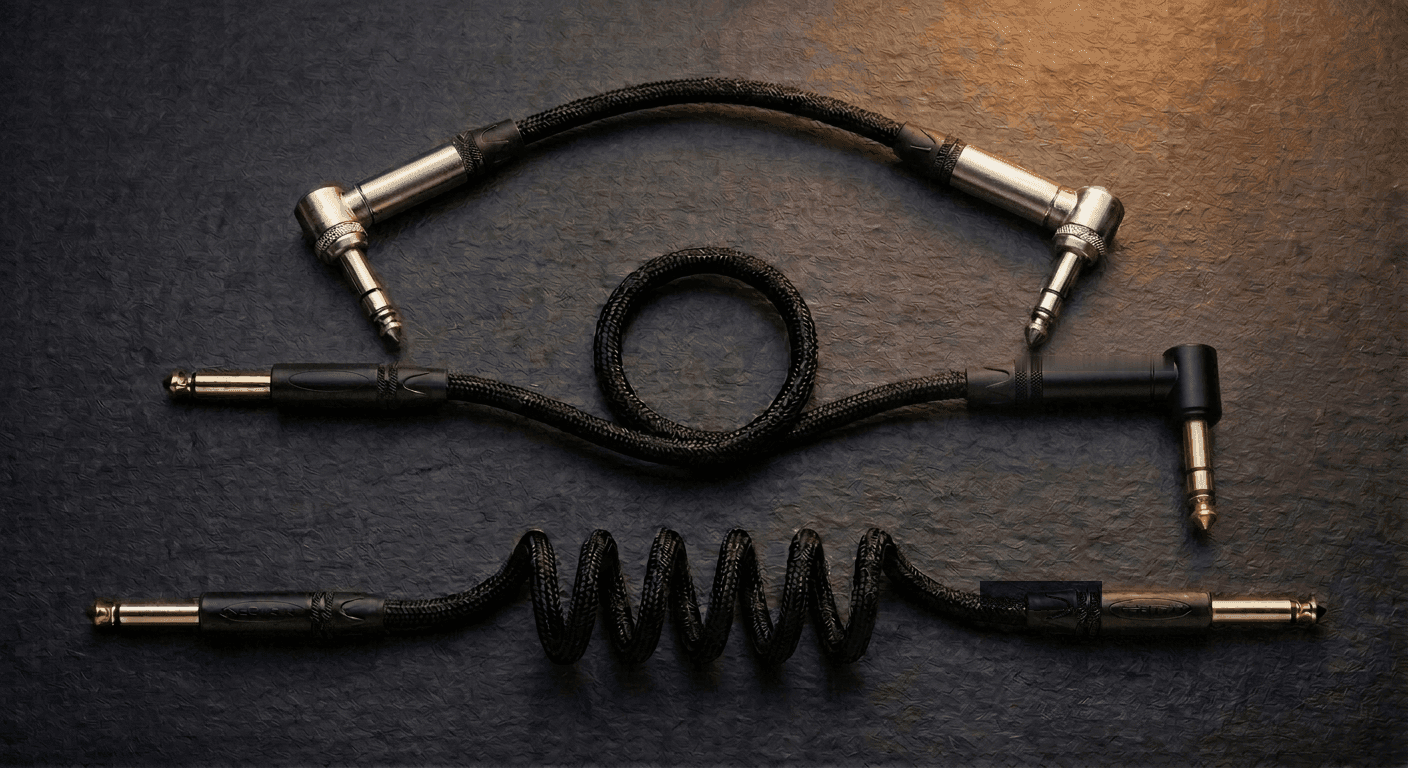
One of the most overlooked aspects of first pedalboard setup is patch cable selection. These short cables connect your pedals to each other, and their quality directly impacts your sound and reliability.

Cheap patch cables can introduce noise, degrade your tone, and fail at the worst possible moments. When you have invested in quality pedals and a good pedalboard, it does not make sense to compromise on the cables connecting them.

Look for patch cables with quality connectors that make solid contact with your pedal jacks. Loose or poorly made connectors can cause crackling, intermittent signal loss, and unwanted noise. The cable itself should be well-shielded to prevent interference from power supplies and other electronic devices.

Reliability is crucial, especially if you perform live. A failed patch cable during a performance can silence your entire rig. This is why many serious guitarists choose cables with lifetime guarantees, such as those from Forever Cables. Knowing that your patch cables are backed by a lifetime guarantee provides peace of mind and can actually save money in the long run compared to repeatedly replacing cheap cables that fail.

Cable length also matters. Use the shortest cable that comfortably reaches between each pair of pedals. Excessively long cables can introduce capacitance, which can subtly degrade your high-end frequencies. However, do not use cables so short that they create strain on the jacks or make it difficult to remove pedals for adjustments.

Right-angle connectors are popular for pedalboard use because they save space and keep cables tidy. However, make sure the orientation matches your pedal layout. Some pedals have top-mounted jacks, others side-mounted, so plan accordingly.

Power Supply Options

Powering your pedalboard properly is essential for both performance and longevity of your pedals. You have several options, each with advantages and drawbacks.

Individual 9V Batteries: While this was common in the past, it is impractical for pedalboards. Batteries die at inconvenient times, they are expensive to replace regularly, and they add weight to your board. This option only makes sense if you have just one or two pedals.

Daisy Chain Power Cables: These are cheap cables that split one power supply into multiple outputs. While inexpensive, they share a common ground among all pedals, which often introduces unwanted noise and hum. They are acceptable for quiet, low-gain pedals but problematic with high-gain distortion or digital pedals.

Isolated Power Supplies: This is the professional choice and worth the investment. Isolated power supplies provide clean, isolated power to each pedal, eliminating ground loop hum and ensuring each pedal receives consistent voltage. Popular options include the Truetone CS-series, Strymon Zuma, and Voodoo Lab Pedal Power.

When choosing a power supply, count your pedals and check their power requirements. Most pedals use 9V DC center-negative power, but some require different voltages or draw more current. Make sure your power supply has enough outputs and that each output can deliver sufficient current for the pedals connected to it.

Also consider future expansion. If you have five pedals now but plan to add more, get a power supply with extra outputs.

Mounting and Organizing Your Pedals

With your pedalboard, pedals, cables, and power supply ready, it is time to actually mount everything.

Most pedalboards use hook-and-loop fastener (Velcro) to secure pedals. Apply the soft (loop) side to your pedalboard and the rough (hook) side to your pedals. Use enough fastener to hold each pedal securely, but do not go overboard or you will struggle to remove pedals later for adjustments or repairs.

Before permanently mounting anything, lay out your pedals on the board in signal chain order. Consider accessibility: put pedals you will adjust frequently toward the front or on top. Pedals you set and forget can go in back or on lower rows.

Think about cable routing. Arrange pedals to minimize cable lengths and crossing cables. If one pedal has input and output jacks on the left and the next pedal has them on the right, you might want to reposition them.

Make sure you can reach each pedal power jack. Some pedals have power jacks in awkward locations that might be blocked by neighboring pedals. And if you will be switching pedals by foot during performance, ensure there is enough space between them. You do not want to accidentally hit two switches at once.

Once you are happy with the layout, attach the fasteners and mount your pedals. Then connect your patch cables, starting from the input and working toward the output. Keep cables neat by routing them under the pedalboard when possible or securing them with cable ties.

Finally, connect your power supply. Route power cables carefully to avoid having them run parallel to audio cables, which can introduce hum. If power cables must cross audio cables, have them cross at right angles rather than running alongside each other.

Troubleshooting Hum and Signal Loss

Even with careful setup, you might encounter issues. Here are common problems and solutions.

Hum or Buzz: This is usually caused by ground loops or electromagnetic interference. Try using an isolated power supply instead of a daisy chain, route power cables away from audio cables, ensure all pedals are properly grounded, check for poor cable connections, and try plugging your power supply into the same electrical circuit as your amplifier.

Signal Loss or Weak Sound: Check all cable connections and ensure they are fully inserted. Try bypassing pedals one at a time to isolate the problem. Verify that buffered bypass or true bypass considerations are not causing issues with long cable runs. Make sure your power supply is providing adequate current to all pedals, and inspect patch cables for damage or faulty connectors.

Pedal Not Working: Troubleshoot systematically. Check that the pedal is receiving power (many have LED indicators). Verify cables are connected to the correct input and output jacks. Try the pedal in isolation, directly between guitar and amp. Check the battery if battery-powered, and ensure any internal trim pots or switches are set correctly.

Intermittent Crackling: Often caused by loose cable connections (especially with worn patch cables), dirty or oxidized jacks on pedals, failing power supply, or damaged pedal footswitches.

Maintaining a systematic approach to troubleshooting saves time. Work through your signal chain one pedal at a time, testing as you go, rather than trying to diagnose everything at once.

Building Your Sound

Now that you understand how to set up guitar pedalboard systems, remember that your pedalboard is never truly finished. As you grow as a musician, your needs will evolve. You might discover new pedal types, reorganize your signal chain for different sounds, or upgrade individual pedals.

Start with the basics: a solid pedalboard, quality power supply, reliable patch cables, and a few essential pedals. Make sure your foundation is solid with proper signal chain order and clean power. Once everything works reliably, you can experiment with different arrangements and new effects.

The key is building a system you understand. When you know why each pedal is positioned where it is, why you chose specific cables, and how your power supply works, you are equipped to solve problems quickly and make informed decisions about future additions.

Your first pedalboard setup is an exciting step in your musical journey. Take your time, plan carefully, and do not be afraid to experiment. With the foundation you have built following this guide, you will have a reliable, great-sounding pedalboard that will inspire your playing for years to come.

Whether you are playing bedroom practice sessions or your first live gigs, a well-organized pedalboard with quality components like Forever Cables connecting your pedals will give you confidence that your sound will be consistent and reliable every time you play.

Built for This

Forever Cables patch cables are hand-soldered with Neutrik connectors and backed by a lifetime guarantee. Build your first pedalboard on cables that last.
Stay in the loop

New gear guides, limited promos, and launch updates. No spam.

Hatch Patch Cables makes hand-soldered, lifetime-guaranteed patch cables under the Forever Cables product line. Every cable is built to order.

Related Articles