Pedalboard Cable Management: How to Wire Your Board Like a Pro
If you've built your first pedalboard and powered it up only to hear unwanted noise, dealt with cables that somehow manage to get tangled despite being only six inches long, or found yourself with a rats' nest that makes swapping pedals a nightmare, you already know the truth: cable management isn't just about aesthetics. It's about functionality, reliability, and preserving your tone.
Good cable management reduces noise, prevents signal loss, makes troubleshooting easier, and keeps your rig looking professional. Poor cable management creates ground loops, causes intermittent connections, and turns every setup or teardown into an exercise in frustration.
The difference between a well-wired board and a chaotic one comes down to planning, precision, and using the right techniques. Here's how to wire your pedalboard like a seasoned guitar tech.
Why Cable Management Actually Matters
Before diving into techniques, it's worth understanding what you're solving for. Cable management on a pedalboard isn't just about tidiness; it directly affects your sound and your workflow.
**Tone and Signal Integrity**: Every unnecessary inch of cable adds capacitance to your signal chain, which can roll off high frequencies and dull your tone. Properly measured cables keep your signal path as short as possible without creating strain or tension on your jacks.
**Noise Reduction**: Messy cables create opportunities for interference. When patch cables cross power cables at perpendicular angles or run parallel for long distances, you invite hum and buzz into your signal. Clean cable routing minimizes these interactions and keeps your noise floor low.
**Reliability**: Cables that are too short create tension on your pedal jacks, loosening them over time and eventually causing intermittent connections or complete failure. Cables that are too long create loops and tangles that stress connectors when you're packing up or making changes.
**Workflow**: A well-routed board makes it easy to identify which cable goes where, swap out pedals, troubleshoot signal issues, and reconfigure your chain on the fly. A poorly routed board turns every adjustment into a puzzle.
**Aesthetics**: Let's be honest: a clean pedalboard just looks better. Whether you're posting to Instagram or setting up on stage, a professionally wired board communicates that you take your rig seriously.
Plan Your Signal Chain Layout Before Buying Cables
The single biggest mistake players make is buying a set of patch cables before they've finalized their signal chain layout. You can't choose the right cable lengths until you know exactly where each pedal will sit.
Start by arranging your pedals on your board without cables. Consider these factors:
**Signal Flow**: Most players run their chain left to right or bottom to top, but there's no universal rule. Arrange pedals in the order they'll appear in your signal chain, keeping in mind that you might want frequently adjusted pedals (like overdrive or delay) in easily accessible positions.
**Jack Orientation**: Note whether each pedal has top-mounted or side-mounted jacks. Pedals with side-mounted jacks generally need to sit closer to their neighbors, while top-mounted jacks give you more flexibility.
**Power Routing**: If you're using an under-board power supply, position pedals so their power jacks can reach without excessive cable length. This often means placing high-current digital pedals closer to the power supply.
**Access and Footswitches**: Make sure you can actually step on each pedal without hitting others. Leave enough space for your foot, not just for the cables.
Once you've settled on a layout, take photos from multiple angles. These will be your reference when measuring cable runs.
How to Measure Cable Runs Correctly
Measuring for patch cables isn't complicated, but it requires precision. Too short and you'll stress your jacks; too long and you'll have excess cable to manage.
**Use String or Wire**: Take a piece of non-stretch string or a spare piece of wire and route it from the output jack of one pedal to the input jack of the next, following the path the cable will actually take. Don't measure straight-line distance; measure the actual route, accounting for any curves, height differences, or obstacles.
**Add Slack for Connector Bodies**: Remember that your cable measurement doesn't include the physical length of the connectors themselves. A six-inch cable has six inches of cable between the connector bodies, but the total length from tip to tip will be longer once you account for the ¼" plugs. Most players add about half an inch to an inch of slack to ensure the cable doesn't pull tight.
**Account for Board Flex**: Pedalboards flex slightly when you step on them, especially wooden or lightweight boards. Build in a tiny bit of extra length (a quarter-inch or so) to ensure that normal use doesn't create tension on the jacks.
**Consider Your Routing Style**: If you plan to route cables under the board (more on this later), you'll need to account for the distance down from the jack, across the underside, and back up to the next pedal. Measure accordingly.
Write down each cable run with pedal names: "Overdrive to Delay: 4 inches," "Delay to Reverb: 6 inches," etc. This becomes your shopping list.
Patch Cable Length Guide for Different Board Sizes
While every board is unique, there are some general guidelines based on common pedalboard sizes and layouts.
**Small Boards (Pedaltrain Nano, Templeboard Duo)**: These compact boards typically hold three to five pedals in a single row. Most connections will use 3- to 6-inch cables, with the occasional 8-inch cable if pedals are spread out.
**Medium Boards (Pedaltrain Classic Jr, Templeboard Solo)**: Medium boards often fit five to eight pedals, sometimes in two rows. You'll need a mix of 4- to 8-inch cables for neighboring pedals, and potentially 10- to 12-inch cables if you're running connections from the back row to the front row.
**Large Boards (Pedaltrain Classic Pro, Templeboard Trio)**: Large boards with multiple rows require a wider range of lengths. Adjacent pedals might use 4- to 6-inch cables, while cross-row connections often need 10- to 18-inch cables depending on your layout.
**Custom or Multi-Tier Boards**: If you're building a custom board with risers or tiers, you'll likely need some longer runs (12 to 24 inches) to bridge height differences. Measure each run individually rather than relying on standard lengths.
The key is variety. Don't assume you can wire an entire board with one cable length. Buy (or build) cables in multiple lengths matched to your specific layout.
Right-Angle vs Straight Connectors for Tight Spaces
Connector type is just as important as cable length when it comes to efficient cable management. The choice between straight and right-angle connectors affects how much space you need between pedals and how cleanly cables route across your board.
**Right-Angle Connectors**: These are essential for side-mounted jacks, especially on tightly packed boards. A right-angle connector exits parallel to the pedal surface, allowing you to place pedals close together without cables interfering. Right-angle connectors also reduce mechanical stress on side-mounted jacks by absorbing board flex in their natural plane of movement.
On a dense board with boutique pedals (most of which have side-mounted jacks), right-angle connectors are practically mandatory. They allow you to pack pedals within inches of each other while keeping cable profiles low.
**Straight Connectors**: Straight connectors work best for top-mounted jacks, where the cable exits vertically away from the board surface. They also work well on boards with generous spacing, simple signal chains, or pedals with mixed jack orientations.
The most effective approach is to use both types strategically. A typical well-designed board might use right-angle connectors for all side-mounted jacks and straight connectors for top-mounted jacks, creating a clean, organized look with minimal wasted space.
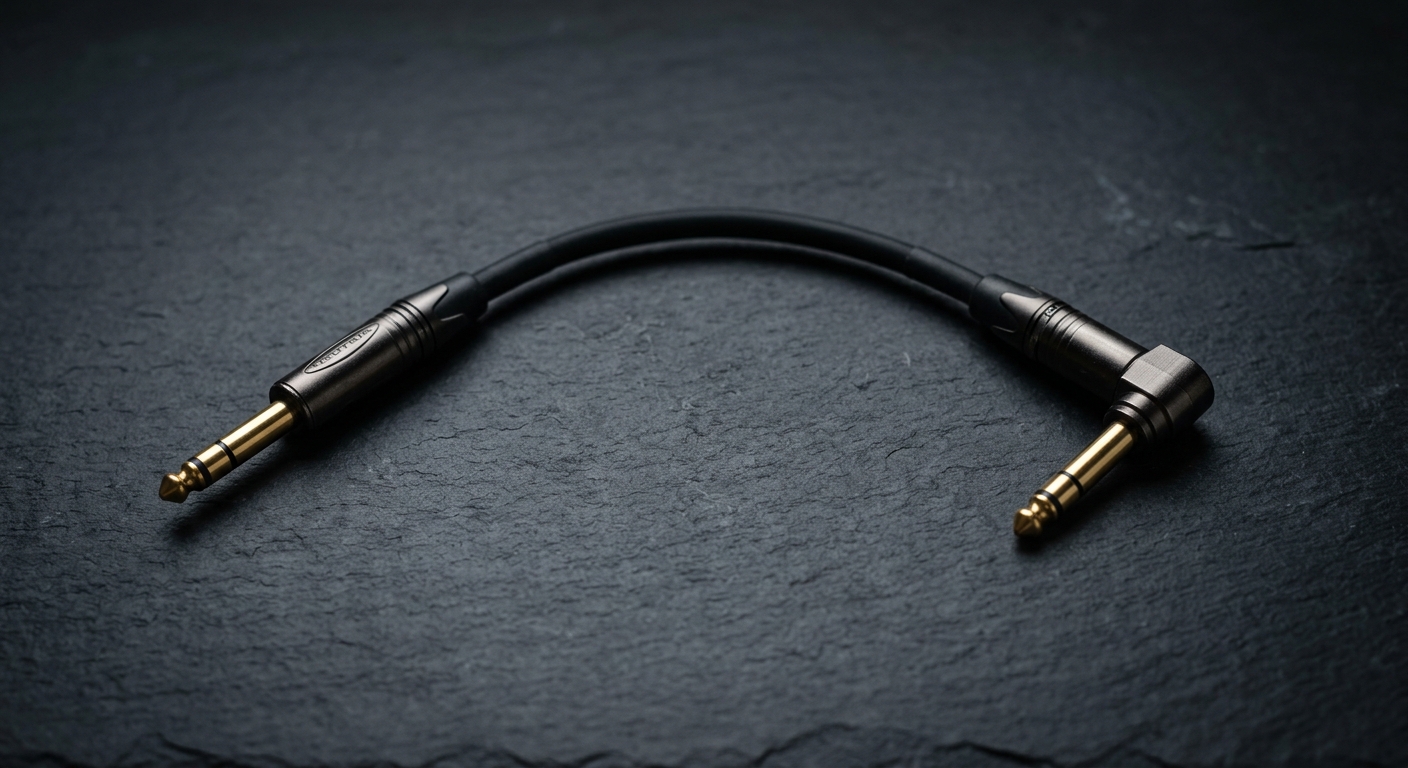
For example, you might use a right-angle patch cable like **The Right Angle from Forever Cables** for connections between side-mounted jacks where space is tight, and **The Workhorse** (a straight patch cable) for top-mounted jacks or where you have more room to work. Both cables are built with the same lifetime guarantee, so your choice is purely about what works best for your specific layout.
Cable Routing Techniques: Creating a Clean Board
Once you have the right cables, how you route them makes all the difference. Here are the main approaches.
Over-Board Routing
This is the simplest method: run cables across the top surface of your board from pedal to pedal. It's fast, easy to modify, and makes troubleshooting straightforward since every connection is visible.
The downside is aesthetics and potential noise. Cables running across the surface can look messy, and they're more likely to cross paths with power cables or create loops that pick up interference.
If you're routing over the board, keep cables as short as possible and try to run them along the edges of pedals rather than diagonally across open space. Use velcro straps or cable ties to bundle parallel runs together and keep them tidy.
Under-Board Routing
Many modern pedalboards (like Pedaltrain and Templeboard models) feature slotted surfaces that allow you to drop cables underneath the board. This creates an extremely clean look and keeps signal cables separated from power cables, reducing noise.
To route under the board, measure from the output jack down through the nearest slot, across the underside to a slot near the next pedal, and back up to the input jack. This usually requires longer cables than over-board routing, but the payoff in organization and noise reduction is significant.
The main limitation is flexibility. If you want to rearrange pedals, you might need to re-route cables, which can be time-consuming. Under-board routing works best for boards with stable, well-planned layouts.
Hybrid Routing
Most professional boards use a combination of both methods: under-board routing for long runs (especially those that would otherwise cross multiple pedals), and over-board routing for short, direct connections.
For example, you might route your tuner to the first pedal under the board to keep that cable out of the way, then use short over-board cables for the rest of the chain, and finally run your output to your amp under the board.
Hybrid routing gives you the best of both worlds: clean aesthetics where it matters, and easy access where you need it.
Velcro Straps and Cable Ties
Regardless of your routing method, securing cables keeps them from shifting during transport or use. Velcro straps are reusable and won't damage cables, making them ideal for pedalboards where you might occasionally swap pedals. Wrap a velcro strap around parallel cable runs to bundle them together.
Avoid using plastic zip ties on signal cables. They can create pressure points that damage cable jackets over time, and they're not reusable, forcing you to cut them every time you make a change.
If you do use cable ties, use them only on permanent installations and make sure they're snug but not overly tight. Leave a little slack to avoid crushing the cable.
Cable Channels and Wire Loom
For larger boards, consider adding adhesive cable channels or split wire loom to the underside or edges of your board. These create dedicated pathways for cables, keeping them organized and protecting them from damage.
Wire loom is especially useful if you're running both signal and power cables under your board. Keep signal cables in one channel and power cables in another to minimize interference.
Common Mistakes and How to Avoid Them
Even experienced players make cable management mistakes. Here are the most common ones and how to fix them.
**Using Cables That Are Too Long**: Excess cable length creates loops, tangles, and unnecessary capacitance. It's tempting to buy a set of 12-inch cables and use them everywhere, but this creates more problems than it solves. Measure each run and use appropriately sized cables.
**Crossing Signal and Power Cables at Parallel Angles**: When signal cables run parallel to power cables, they act like antennas, picking up hum from the AC current. If you must cross a signal cable with a power cable, do it at a 90-degree angle to minimize interference. Better yet, route them on opposite sides of the board.
**Over-Tightening Cables**: Cables that pull tight on your jacks create stress that will eventually loosen or damage the jack. Always leave a small amount of slack. The cable should have a gentle curve, not a straight, taut line.
**Forgetting About Access**: Don't route cables in a way that blocks access to battery compartments, trim pots, or internal DIP switches. You'll regret it the first time you need to change a battery or adjust an internal setting.
**Using Low-Quality Cables**: Cheap patch cables with poor solder joints, thin jackets, or weak connectors will fail at the worst possible time. Invest in quality cables with solid construction and good strain relief. Cables with a lifetime guarantee (like those from **Forever Cables at liferline.com**) cost more upfront but save you the frustration and expense of replacing failed cables on the road.
**Not Labeling Complex Boards**: If you have a large or complicated board with multiple ins and outs (stereo rigs, effects loops, expression pedal connections), label your cables. A small piece of tape or heat-shrink tubing with a marker can save you hours of troubleshooting.
**Ignoring Jack Orientation**: Using a straight connector on a side-mounted jack (or vice versa) wastes space and creates awkward cable angles. Match your connector type to your jack orientation for the best results.
Putting It All Together: A Step-by-Step Wiring Process
Here's how to approach wiring a board from scratch:
1. **Finalize your signal chain order** and arrange pedals on your board without cables.
2. **Plan your power routing** and install your power supply.
3. **Measure each patch cable run** using string or wire, accounting for connectors and slight slack.
4. **Order or build cables** in the specific lengths and connector types you need.
5. **Start wiring from the input**: connect your guitar cable to your tuner or first pedal, then work your way through the chain in signal order.
6. **Route cables intentionally**: decide whether each cable goes over or under the board based on length, accessibility, and aesthetics.
7. **Secure cables** with velcro straps or cable ties once everything is connected and working.
8. **Test your board** with your guitar and amp, listening for noise, signal loss, or intermittent connections. Fix any issues before finalizing your cable management.
9. **Document your layout**: take photos and write down cable lengths and types for future reference.
Final Thoughts
Cable management isn't glamorous, but it's one of the most important aspects of building a reliable, professional pedalboard. The time you spend planning your layout, measuring cable runs, and routing cables thoughtfully will pay off every time you plug in, make a change, or pack up for a gig.
Start with a clear signal chain plan, measure carefully, use the right cable lengths and connector types for your specific layout, and route cables in a way that minimizes noise and maximizes accessibility. Do that, and you'll have a pedalboard that looks great, sounds great, and works flawlessly for years.
Your board is the foundation of your tone. Wire it like you mean it.
Built for This
Forever Cables are hand-soldered with Neutrik connectors and Canare GS-6 wire, available in both straight and right-angle configurations. Built to last a lifetime, guaranteed for life. Wire your board with cables that will never let you down.
Stay in the loop
New gear guides, limited promos, and launch updates. No spam.